Protocol - Waste Management Lab Course
WT2023/24 | Course No. 718837
Thomas Klammsteiner, PhD 
Sebastian Hupfauf, PhD
Course supervisors:
Thomas Klammsteiner, PhD
thomas.klammsteiner@uibk.ac.atSebastian Hupfauf, PhD
sebastian.hupfauf@uibk.ac.at
Teaching assistant:
- Laura M. Marte, BSc
laura.m.marte@student.uibk.ac.at
Source reference cover picture:
- Biogas plant Jühnde http://www.goettinger-tageblatt.de
- Cow in the Alps https://www.kleinezeitung.at
Schedule
| Abbreviation | Description |
|---|---|
| CNP | Sampling for C/N-Analysis |
| CSB | Chemical oxygen demand |
| EC | Electrical Conductivity |
| FOS/TAC | Alkalinity (Ratio of organic acids to carbonate buffer capacity) |
| GM | Measuring amount and composition of gas |
| PN/PNF | Sampling / Sampling and feeding |
| PT | Pathogen test with selective media |
| TS, oTS | Dry matter, organic dry matter |
| VFA | Volatile Fatty Acids |
| DNA Q&S | DNA quantification (Quantus) and Sanger sequencing |
Objective
The aim of this lab course is to simulate biogas production on a laboratory scale and to learn methods for measuring important monitoring parameters. This involves adjusting various parameters and observing the effects on gas production and other important process parameters.
To bring along
Lab coat, calculator, writing utensils, permanent marker, this lab protocol, lots of motivation
Meeting point
Mo-Fri, 0900AM, Microbiology - practice laboratory (G02), NATWI building, Technikerstraße 25, 2nd floor!
Grading
The final grade for the lab course is calculated in equal parts (25%) from the following four partial grades:
Introduction test: On the first day of the lab course, there will be a short introductory test on the content of the lab course protocol. The test will largely consist of multiple-choice questions.
Collaboration: The individual co-operation of all students is assessed during the entire internship period.
Group work:
- Each group carries out a literature review on their chosen treatment (e.g. co-digestion, temperature, feeding rate) in parallel with their work in the laboratory. The relevance in practice, the effect on the methane yield, the effect on the microorganisms, unanswered questions and the future potential will be discussed. The results will be presented in groups on the last laboratory day using a PC with a projector (approx. 10 minutes per group).
- The most important results of the biogas monitoring should be presented in groups in the form of posters. On the debriefing date, the posters will be presented to the other course participants and the results presented. In addition, results that were not included in the poster will be presented in a short PowerPoint presentation (duration for poster presentation + presentation of further results: approx. 20 minutes per group). The posters do not have to be printed! The presentations will be made using a PC with a projector.
Abstract: The students prepare an extended abstract (two A4 pages), as is usual for conference participation or scientific publications. This should explain the experimental approach and present the most important results. Further information on writing a scientific abstract will be provided during the lab course. Ideally, it should be submitted by e-mail (to one of the course instructors), with the day of the debriefing set as the deadline.
1. Safety in the lab
1.1. Laboratory
Information on the location and use of the laboratory’s safety equipment: first aid equipment, escape routes, telephone, fire alarms, location of fire extinguishing agents, eye and emergency showers, absorbent materials for chemicals, main switch for gas and electricity supply.
1.2. Behaviour in the lab
- There are no “stupid” questions. If anything is unclear, ask the course instructor or tutor immediately!
- Students must never work alone in the lab.
- When working with unknown chemicals, everyone must be aware of the hazard symbols on the packaging or consult the Internet for information on safe handling (properties, hazard and safety phrases; Material Safety Data Sheet (MSDS)) and possible sources of danger. Example: Use of the GESTIS database!
- Consumption/use and storage of food, drinks, medicines, tobacco products, chewing gum and cosmetics in the laboratory area is prohibited, as is the insertion of contact lenses.
- Work surfaces should always be tidy and clean. The “polluter pays” principle applies: everyone cleans and decontaminates the surfaces, containers, equipment or other facilities they use themselves. Spilt material must be disposed of properly immediately!
- In the evening, windows and tilt windows must be closed, electrical devices switched off and media connections (compressed air, water, deionised water) switched off.
- Hands must be cleaned and disinfected before starting and after completing laboratory work.
- All solutions prepared in the lab, containers used, etc. must be labelled with name (or group number), contents and date without exception. Each student is responsible for the correct disposal of materials. This includes
- Autoclaving enriched bacterial cultures and contaminated laboratory utensils
- Removing the labelling from vessels
- Proper cleaning of containers/laboratory utensils
- Tidying up the containers/chemical packs in their appropriate storage locations
1.3. Personal protective equipment
- It is not permitted to work without a lab coat.
- Long trousers and closed shoes must be worn.
- Protective gloves must always be worn when handling irritating or toxic substances or media that could contain potential pathogens (e.g. slurry or reactor sludge). Furthermore, safety goggles must always be worn during activities where there is a risk of splashing - we work with pressurised systems! Unknown microorganisms must always be regarded as pathogenic.
- Safety goggles must also always be worn when working with acids and bases. (Work with acids and bases may not be carried out in the practical course without a supervisor)
1.4. Behaviour in dangerous situations
- General behaviour: D-A-R-E (Don’t panic, Alarm, Rescue, Extinguish)
- Health and safety violations, near-accidents and any accidents at work must be reported to the lab course supervisors.
2. Introduction
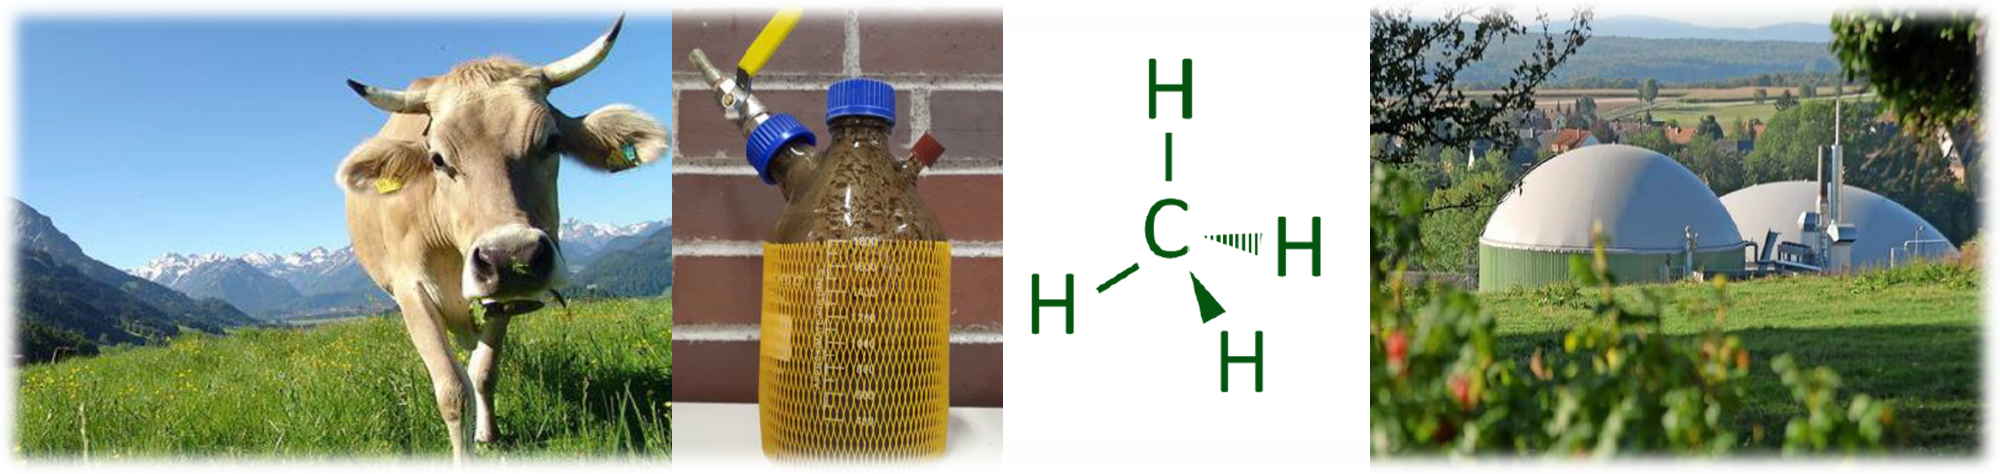
By definition, biogas is a combustible, volatile gas produced by the anaerobic fermentation of biomass. The main components are methane (CH4, 50-75%) and carbon dioxide (CO2, 25-50%). There are also smaller amounts of nitrogen (N2), ammonia (NH3), hydrogen (H2), hydrogen sulphide (H2S), water vapour (H2O), oxygen (O2) and other trace gases. The exact composition depends heavily on the substrate composition and the operating mode of the bioreactor (BMVIT, 2014). The production of biogas is a sustainable and ecological way of generating energy, as no climate-active greenhouse gases are released under optimal conditions. Furthermore, the use of organic residues as a substrate source can be promoted, which simultaneously solves problems associated with waste treatment and disposal. In addition to important ecological effects in the areas of environmental and climate protection, the anaerobic digestion of agricultural waste also offers socio-economic advantages. Another advantage is that the fermentation residues produced, which generally have an improved fertilising effect, a reduced number of pathogens and reduced odour pollution compared to the original substrates, can be applied directly to fields on site (Goberna et al., 2011; Insam et al., 2015).
In agricultural plants, liquid manure (slurry), which is produced during animal husbandry on the farms, is usually used as a basic substrate for biogas production. The use of liquid manure is de facto free of charge, it has a suitable water content and is usually produced in large quantities. However, due to the limited gas formation potential (low C/N ratio), it makes sense to also ferment other, energetically valuable materials as so-called co-substrates (Kaiser, 2007). For example, other agricultural waste products (straw, crop waste, etc.), industrial residues (from bakeries, abattoirs, dairies, breweries, etc.), municipal waste (e.g. shrub cuttings) and collected organic waste from private households can be used for this purpose. In recent years, “NAWARO” plants (renewable raw materials) such as maize, soya, beet or grain, which are planted exclusively for the production of biogas, have also been increasingly used. Although extremely efficient in energy production, the ethical question must be raised as to whether potential foodstuffs should be used for energy production. NAWARO plants are often in direct competition for land with the feed and food industry and the huge monocultures required for this are also questionable from an ecological perspective (EU, 2014). In agricultural plants, liquid manure (slurry), which is produced during animal husbandry on the farms, is usually used as a basic substrate for biogas production. The use of liquid manure is de facto free of charge, it has a suitable water content and is usually produced in large quantities. However, due to the limited gas formation potential (low C/N ratio), it makes sense to also ferment other, energetically valuable materials as so-called co-substrates (Kaiser, 2007). For example, other agricultural waste products (straw, crop waste, etc.), industrial residues (from bakeries, abattoirs, dairies, breweries, etc.), municipal waste (e.g. shrub cuttings) and collected organic waste from private households can be used for this purpose. In recent years, “NAWARO” plants (renewable raw materials) such as maize, soya, beet or grain, which are planted exclusively for the production of biogas, have also been increasingly used. Although extremely efficient in energy production, the ethical question must be raised as to whether potential foodstuffs should be used for energy production. NAWARO plants are often in direct competition for land with the feed and food industry and the huge monocultures required for this are also questionable from an ecological perspective (EU, 2014).
Apart from the substrate (mixture) used, the biogas production process also depends on a number of other parameters, such as temperature, substrate mixing, feed quantity and pH value. The choice of temperature in particular is decisive for the efficiency of the biogas plant and enables operators to control the process. Nowadays, large-scale plants are usually operated under mesophilic (30-40 °C) or thermophilic (50-60 °C) conditions (Jain et al., 2015). However, recent studies show that the gap between these two temperature ranges is particularly interesting, as the advantages of both ranges can be combined here and optimal biogas yields can be achieved (Hupfauf et al., 2018; Tian et al., 2018). The advantages of mesophilic biogas production are high process stability (Labatut et al., 2014) and the low energy required to maintain a constant temperature in the bioreactor. Thermophilic fermentation, on the other hand, leads to better hygienisation of the digestate produced (Sahlström, 2003) and allows higher metabolic rates of the microorganisms involved.
The aim of this lab course is to demonstrate the possible microbial resource utilisation of materials generally declared as “waste”. This is to be illustrated in the form of an anaerobic fermentation experiment with an agricultural residue (cattle manure). In order to demonstrate the influence of various process parameters, the students should decide in groups which adjustments they want to make during the experiment and then observe their effects. In addition to comparing the measured biogas yield and composition, the aim is to familiarise students with the basic parameters for monitoring a biogas plant. In addition, the hygienisation potential will be assessed with the help of a plating experiment on selective media. Selected pure cultures will also be identified using molecular biology.
2.1. The process of anaerobic digestion
In general, the process of anaerobic digestion can be divided into four main steps (see Fig. 1). During the initial hydrolysis, which determines the speed of the entire process, especially for substrates that are difficult to degrade (Hasegawa et al., 2000), organic polymers are broken down into smaller components (sugars, amino acids, fatty acids, etc.). In addition to obligate anaerobic microorganisms, facultative anaerobic species are also active at this stage. Acidogenic microorganisms subsequently form carbon dioxide (CO2), hydrogen (H2), ammonium (NH4) and organic acids (e.g. propionic, butyric or valeric acid) from these molecules. In the course of the third phase, the acetogenic phase, secondary fermentative bacteria form acetate, H2 and CO2.
These endergonic reactions would not take place under standard conditions, or only slowly, but the local proximity of syntrophic microorganisms and the immediate conversion of the resulting products by methane-forming archaea enable this biochemical metabolic pathway (Conrad et al., 1986).
In methanogenesis, a fundamental distinction can be made between three different pathways (see Tab. 1). In hydrogenotrophic methane formation, CH4 is formed by the reduction of CO2 with H2. In acetoclastic methane formation, which is quantitatively the most important reaction pathway, CH4 and CO2 are obtained from the cleavage of acetate (Ahring et al., 2003). In a third possible metabolic pathway, methyl compounds (C1 compounds) are used. In addition, so-called homoacetogenic bacteria can also form new acetates, which is referred to as homoacetogenesis (Boe, 2006). Conversely, acetate can be converted into CO2 and H2 by SAOB (syntrophic acetate-oxidising bacteria) through syntrophic acetate oxidation (SAO). The resulting products are then frequently utilised by syntrophically associated hydrogenotrophic methanogens to form CH4. This results in an interspecies transfer of H2 or CHO2-, known as IHT (interspecies hydrogen transfer). Which metabolic pathway is active in a biogas plant always depends on the process conditions, above all the temperature.
Tab. 1: Selection of important metabolic pathways of methanogenesis and their thermodynamic potential.| Reaction formula | ΔG0 [kJ mol-1 CH4] | Representative |
|---|---|---|
| CO2 + 4 H2 –> CH4 + 2 H2O | -135 | nearly all methanogens |
| 4 HCOOH –> CH4 + 3 CO2 + 2 H2O | -130 | nearly all methanogens |
| 4 CO + 2 H2O –> CH4 + 3 CO2 | -196 | Methanothermobacter, Methanosarcina |
| 4 CH3OH –>3 CH4 + CO2 + 2 H2O | -105 | Methanosarcina, methylotrophic methanogens |
| CH3OH + H2 –> CH4 + H2O | -113 | Methanomicrococcus, Methanosphaera |
| CH3COOH –> CH4 + CO2 | -33 | Methanosarcina, Methanosaeta |
3. Material and methods
3.1. Experimental setup
3.1.1. Reactor system
Schott bottle reactors have proven themselves for years as robust and easy-to-operate reactor systems on a small laboratory scale. They can be operated either as batch systems or semi-continuous reactors and are therefore extremely flexible in their mode of operation. The main disadvantages are the lack of integrated gas measurement or storage systems, which means that the reactors have to be checked daily, including gas sampling, to prevent the pressure in the reactor system from becoming too high. In addition, there is always a risk of leaks in such a pressurised system, which can lead to significant errors in gas measurement. In addition, increased safety precautions are always required when working with reactors of this type, for example laboratory goggles must always be worn.
We use modified laboratory bottles (2.35 litre volume) with three openings at the top (Fig. 2). These openings allow the connection of various valves, taps or measuring devices and ensure a versatile and customisable use of the reactors. Only one opening (on the side at the top of the reactor) is required for the practical course; the second and third openings are sealed airtight with appropriate sealing caps and suitable sealing rings. A gas-tight brass ball valve is screwed onto the remaining opening. The ball valve is used for feeding, sampling and gas measurement of the reactors. Silicone sealing rings and Teflon sealing tape are used during assembly to ensure complete tightness. To reduce the risk of flying glass splinters in the event of glass breakage, the reactors are encased in a safety net.
3.1.2. Filling the reactors
The reactors are filled together on the first day of the practical course (1 December 2023). The subsequent incubation of the reactors over the weekend before the actual start of the experiment on Monday (d0) enables the system and the microorganisms involved to adapt to the changed conditions and allows the stable operation (without start-up phase) to be investigated during the practical course. For filling, the upper blue lid is unscrewed and 1 litre of sieved cattle slurry (< 2 mm) is filled in using a measuring cylinder. The slurry must be stirred thoroughly beforehand to ensure a uniform substrate in all reactors. The reactor is then tightly closed again and checked for leaks. To do this, a slight overpressure (approx. 0.5 bar) is generated via the ball valve using a bicycle pump (1-2 pump strokes) and the reactor is kept under water. If air bubbles are recognisable, the corresponding point must be better sealed or tightened. The sealed reactors are then incubated at 37 °C with the ball valve closed. Over the weekend, the reactors are shaken daily for 10 seconds and the biogas produced is drained off.
3.1.3. Experiment start
On the first day of the trial (d0), the reactors are prepared by the respective groups according to their chosen control parameter. The following adjustment parameters can be changed (each group decides on one parameter):
- Feeding quantity: 50 – 200 mL
- Temperature: 10 – 60 °C
- Co-substrate: Waste oil and larvae (Hermetia illucens) Residual substrate
- Co-substrate (waste oil) concentration: 1 – 20 g L-1
- Shaking: 10 – 150 rpm
IMPORTANT: In addition to their four reactors (2 values of the control parameter x 2 replicates), each group also maintains two control reactors. These reactors are operated with the following reference parameters for the entire duration of the experiment: 37 °C, 100 mL feed (without co-substrate), 0 rpm. An average value from both control reactors then serves as a reference for the analysed parameters of the respective group.
3.2. Sampling and feeding
ATTENTION: Sampling and feeding is always carried out after the gas measurements (3.3.1, 3.3.2), as the reactors are pressurised up to this point. Failure to observe this may result in injury and unintentional spraying of the reactor contents!
Durchführung:
To take a sample, a clean 100 mL plastic syringe is attached to the silicone tube of the ball valve. The reactor is then tilted until the liquid phase moves to the top of the Schott bottle. The headspace (gas space) is located at the bottom. The valve is opened and the plastic syringe is slowly drawn up to the 100 ml mark. Close the valve and remove the syringe. Only then may the reactor be set up vertically again! If a blockage occurs during sampling, the opening of the syringe and the ball valve (reactor in upright position!) must be cleaned with a pointed object. The sample taken is transferred to three labelled 2 mL Eppendorf tubes (stored at -20 °C) and a labelled Erlenmeyer flask and is now ready for subsequent analyses. For feeding, a clean 100 mL plastic syringe is filled with 100 mL substrate (mixture) (stir well beforehand!). This is then connected to the ball valve and emptied into the reactor after opening the valve. The reactor does not have to be turned upside down! The ball valve is then completely closed again, the reactor is shaken horizontally for 10 seconds and placed back at its incubation location. The same syringe can be used for feeding all reactors, as long as the substrate mixture is uniform! As small quantities of substrate or reactor sludge can easily escape during sampling and feeding, always work with plenty of cellulose and then clean the workplace with ethanol (70%). IMPORTANT: If a group has selected the feeding quantity parameter, other quantities are fed or sampled. However, the amount of material removed must always be replenished with new substrate afterwards! Excess reactor sludge removed is collected and then disposed of. IMPORTANT: If a group has selected the co-substrate or co-substrate concentration parameter, feeding is always carried out with a substrate mixture!
3.3. Gas analyses
Determining the amount of gas is of particular interest in large-scale plants, as the biogas produced should bring the desired financial profit. For this purpose, there is generally a whole range of measuring devices that can measure the gas pressure in a certain volume (manometer), the volume displacement (eudiometer) or the flow rate (flowmeter) of the gas. All of these principles can also be applied on a laboratory scale, but in the practical course we limit ourselves to the pressure-based measurement of the gas volume using a manometer.
3.3.1. Pressure-based measurement of gas volume
The amount of gas produced each day is determined on the basis of pressure using a digital manometer. Procedure: The reactors are removed individually from the incubators and placed in a well-ventilated area (e.g. near the tilted window). The time the reactor spends outside the incubator must be minimised. Otherwise the process can be significantly disturbed and reproducible measurements are no longer possible. The connecting piece of the manometer is connected to the silicone tube at the end of the ball valve. The ball valve is then opened slowly and the differential pressure displayed between inside and outside the reactor is noted. It should be noted that the pressure gauge needs a certain amount of time to reach a constant value. If the pressure drops continuously, the tightness of the connection must be checked! ATTENTION: We are working with pressurised reactor systems here! This requires considered and calm action. It is essential to wear safety goggles during the pressure measurement!
Evaluation:
The amount of biogas produced is then calculated using the following formula:
\(Biogas\ [NmL] = \displaystyle \frac{∆P \ [hPa] \ × \ headspace \ [mL] \ × \ DBF(T)}{1013 \ hPa}\)
The headspace volume of the reactors in the practical course is 1350 mL, the “dry biogas factor” (DBF, Richards et al. (1991)) for the corresponding temperature is taken from Tab. 2. The result is the amount of gas produced under standard conditions (0 °C, 1013 hPa), taking into account the water vapour contained (= dry biogas). Finally, the change over time of all analysed variants compared to the control as well as the accumulated gas production at the end of the test period are shown graphically (mean values ± standard deviation).
Tab. 2: Temperature-specific “dry biogas factor” (DBF, Richards et al. (1991)) for the calculation of dry biogas.| 10 °C | 20 °C | 37 °C | 45 °C | 55 °C | 60 °C | |
|---|---|---|---|---|---|---|
| DBF | 0.953 | 0.909 | 0.824 | 0.773 | 0.697 | 0.658 |
3.3.2. Gas composition
The gas composition is measured using a mobile infrared gas analyser (IRGA; GA5000, Geotech, UK; Fig. 3). This device measures CO2, CH4, H2S, O2 and residual gas photometrically depending on the adsorption of the emitted infrared light by the gas sample. Each gas sample absorbs different amounts of radiation depending on the gases. Each IRGA can only measure the gases for which reference chambers have been installed. Other measuring methods such as gas chromatography or chemical processes must therefore be used to measure any other trace gases relevant to the process (e.g. H2, NH3). Regular calibration of the IRGA is important, which is carried out with a calibration gas and ambient air and must be performed every six months for the device. To demonstrate an alternative measurement method, H2S measurement using Dräger-Tubes will be demonstrated during the practical course (detailed instructions will be provided during the practical course). The H2S content in biogas is of great importance, as this gas causes corrosion damage to metal components (e.g. in combustion engines) in high concentrations (> 200 ppm). Highly contaminated gas must therefore be purified before use. In addition, increased H2S concentrations in the anaerobic system are toxic to microorganisms, especially methanogens (at pH 7.8-8: 50% inhibition from 90 mg L-1; Koster et al. (1986)), and are also harmful to humans in the air we breathe (irritation from 100-200 ppm!).
Execution:
For the measurement, 100 mL of biogas is removed from the reactor using a glass syringe. Like the pressure measurement, the sample is taken via the ball valve. The tip of the glass syringe is connected to the silicone tube and the valve is then carefully opened. The gas withdrawal can be precisely controlled by turning the ball valve slightly. Avoid opening the valve too quickly, as otherwise the plunger could be pushed out of the syringe and damage to the material or injuries could occur. The filled glass syringe is then connected to the IRGA and the measurement is started by pressing the PURGE button. Once the syringe is completely empty, the measurement must be stopped manually by pressing the FLUSH button again. After a short equilibration time, the concentrations of the gases CH4, CO2, H2S and O2 are displayed. The device must be purged with room air between each measurement (until CO2 and CH4 < 0.2%)! Immediately after the analysis, the excess biogas is drained into the reactors, thus reducing the overpressure. Discharge takes place exclusively in the designated area (fume cupboard)! ATTENTION: As the reactors are still pressurised up to this point, the determination of the gas composition must also be carried out carefully and cautiously. This includes in particular the wearing of protective goggles!
Evaluation:
The change over time of all biogas components (CH4, CO2, H2S, O2) is to be graphically represented. In addition, the methane yield (mL CH4 g-1 oTS) of the analysed treatments and the control should be calculated with the help of the gas composition. The choice of a suitable visualisation option is up to the respective groups.
3.4. Physicochemical analyses
3.4.1. pH value
An important feature for the characterization of a bioreactor is the acidity (pH value). The availability of nutrients in particular, but also the toxicity of certain substances (H2S, NH3) depends on the pH value. Most pH meters are potentiometric devices consisting of a glass sphere filled with buffer solution. Protons are deposited in a thin layer on the surface of the glass sphere, causing a galvanic voltage to build up depending on the pH difference between the inside and outside. This voltage is measured using two electrodes, the measuring electrode inside the glass sphere and a reference electrode outside. Procedure: The pH meter must always be calibrated before the first measurement (according to the instructions provided in the lab)! The sludge samples are then measured in the Erlenmeyer flasks. As soon as the pH meter shows a constant value (this is also indicated by a corresponding symbol on the device), the value is noted. The glass electrode must always be rinsed with A.d. between samples. After the analysis, the electrode is thoroughly rinsed again, carefully dried with cellulose and immersed in the storage solution (KCl). As the device used in the practical course is a temperature-corrected pH meter, the samples do not have to be measured at a uniform temperature. However, large deviations from the air temperature will result in (considerably) longer measurement times. ATTENTION: As an acid is required to calibrate the pH meter, protective goggles and gloves must be worn!
Evaluation:
The course of the pH value should be shown graphically over time for all preparations in comparison to the control (mean ± standard deviation).
3.4.2. Electrical conductivity (EC)
Electrical conductivity (= conductivity) indicates how well a substance can conduct electrical current. In a liquid, the conductivity of a substance depends on the number of dissolved ions. The electrical conductivity therefore correlates strongly with the ammonium concentration, but there are also many other salts in the reactor sludge. Excessive electrical conductivity, and therefore too many ions in the solution, can disrupt the anaerobic fermentation process due to unfavorable osmotic conditions (Ma et al., 2018). The EC is measured in the practical course using a conductivity electrode, analogous to the measurement of the pH value. Procedure: The samples are measured either before or after the pH measurement (3.4.1) in the same Erlenmeyer flask. For this purpose, the EC electrode is immersed in the undiluted reactor sludge and the measured value is noted on the device after settling (constant value for approx. 5 s). The Erlenmeyer flasks must always be swirled before the measurement to ensure a well-mixed, homogeneous sample.
Evaluation:
The course of the electrical conductivity should be shown graphically over time for all approaches in comparison to the control (mean value ± standard deviation).
3.4.3. FOS/TAC ratio
The FOS/TAC value describes the ratio of volatile organic acids (FOS) to carbonate alkalinity (total inorganic carbonate, TAC). The alkalinity in the reactor sludge is a measure of the alkaline buffer capacity of the system and determines how robust the pH value is against an accumulation of acids. If a bioreactor has a high alkalinity, a slight accumulation of VFAs will not immediately disrupt the process. FOS/TAC is therefore a standard parameter for assessing the stability of a bioreactor. The measurement is typically carried out by titration to the two pH values 4.4 (FOS) and 5.0 (TAC). In the course of the practical course, titration is carried out using an automatic titrator (Fig. 4) and 0.1 N sulphuric acid.
Execution:
A small amount of sample (e.g. 1 mL) is filled up to 50 mL in a beaker with A.d. and provided with a small magnetic stirrer. The beaker is then placed on the automatic titrator and the pH probe and the acid dosing tube are immersed in the liquid. The glass electrode must never be hit by the magnetic stirrer, as this can easily damage it! The titrator is started and the stirrer is switched on at medium speed. The appliance is controlled via the connected remote control:
- Press
<User Meth>until Load method appears on the display
<Enter>
- Press
<Select>until FOSTAC appears on the display
<Enter>
<Start>
At the end of the measurement, the respective volumes of acid required to reach pH 5 or 4.4 are displayed. Press <Enter> to switch back and forth between the two points. IMPORTANT: The pH electrode must be recalibrated before the first measurement of each group. Calibration is also carried out using the titrator remote control:
- Press
<Mode>until CAL appears on the display
<Enter>
<Start>
The electrode is immersed in buffer 1 (pH 7)
<Enter>
When prompted on the display, the electrode is immersed in buffer 2 (pH 4)
<Enter>
At the end of the process, the calibration parameters are displayed and the first measurement can be started directly according to the procedure explained above.
ATTENTION:
As acids are used for both the calibration of the pH electrode and the titration, protective goggles and gloves must be worn!
Evaluation:
The FOS/TAC ratio is then calculated from the measured values (acid volume) using the following formula:
\(FOS⁄TAC \ [\frac{mg/L}{mg/L}] \ = \ \frac{(B \ × \ \frac{20}{V_P} \ × \ 1.66 \ - \ 0.15) \ × \ 500 \ × \ V_P}{A \ × \ 5000}\)
A = Volume [mL] of the acid needed to reach pH 5.0
B = Volume [mL] of the acid from pH 5.0 to pH 4.4
VP = Volume [mL] of the sample.
The FOS/TAC value should be shown graphically over time for all approaches compared to the control (mean ± standard deviation).
3.4.4. Ammonium content (NH4)
The ammonium content in bioreactors is an important control parameter for monitoring the process. High concentrations, especially under thermophilic conditions, can lead to a considerable process disturbance and an associated drop in gas production. The measurement in the practical course is carried out by means of flow injection analysis (FIA) using the OPA/NAC method (Meseguer-Lloret et al., 2002). The ammonium reacts with ortho-phthaldialdehyde (OPA) and N-acetyl-cysteine (NAC) under alkaline conditions and, after excitation at 415 nm, is measured on a high-performance liquid chromatography (HPLC) system (Fig. 5). Alternatively, ammonium can also be measured classically using a photometer (e.g. Berthelot reaction) or with the aid of rapid cuvette tests (Nanocolor).
Execution:
The thawed samples are centrifuged at 20,000 g for 10 min. The supernatant is then diluted 1:10 with A.d. and sterile-filtered in short Eprouvettes (pore size: 0.2 µm, filter material: regenerated cellulose RC). A 1:5 dilution with A.d. is then prepared and 250 µL pipetted into a 96-well plate (one common plate for all groups, note the positions!). The remaining filtrate must be stored (and sealed at 4 °C), as it is required for the VFA measurement (3.4.5). As soon as a group has pipetted all samples onto the plate, it must be covered immediately and placed at 4 °C. Otherwise there is a risk of the volatile components escaping quickly! As soon as all groups are ready, the plate is sealed with aluminum foil, taken to the analytical laboratory and loaded into the HPLC device.
Evaluation:
After the analysis, we receive a PDF data sheet with NH4-N concentrations in mg L-1. The change in ammonium concentration over time (mean value ± standard deviation) should then be displayed graphically.
3.4.5. Volatile fatty acids (VFAs)
Volatile fatty acids (formate, acetate, propionate, butyrate, valerate) are important intermediate products of anaerobic fermentation and enable the processes within a bioreactor to be monitored precisely. Accumulation generally indicates excessive feeding or an imbalance in the individual phases of the process. In addition, an accumulation of propionate can lead to inhibition of gas production, for example. For this reason, the ratio of acetate to propionate is often used as an indicator of process stability (Weiland, 2008). An accumulation of butyrate or valerate, especially their iso-forms, is another clear indication of stability problems (Drosg, 2013). The volatile fatty acids are measured in the lab using HPLC (Fig. 5). The similar polarity of the compounds in question plays a central role, as this property is used to bind substances to a stationary phase (separation column). The individual substances are then washed from the separation column by changing the polarity of the solvent (eluent) and collected separately. The respective retention time is used to identify the collected compounds.
Execution:
For the VFA measurement, the filtrates (already diluted 1:10) that were prepared in the course of the ammonium determination (3.4.4) can be used. The samples are pipetted directly onto a second (common) 96-well plate, whereby the respective position must also be noted exactly! As volatile fatty acids can usually outgas very quickly and the measurement would therefore be subject to a large error, the plate must always be stored at 4 °C until the final measurement. As soon as all groups have loaded their samples, the plate is firmly sealed with adhesive foil.
Evaluation:
The output of the HPLC is a so-called chromatogram, in which different peaks follow one another in series. Each peak represents a specific chemical compound and the area under the peak describes its quantity (calculation via integration). The exact quantity normally has to be determined using a standard measurement. In our case, however, this step is no longer necessary as the method is already established. We receive the data in the form of a PDF data sheet with concentrations in mmol L-1, which are then displayed graphically over the test period.
3.4.6. Chemical oxygen demand (COD)
The chemical oxygen demand is an important parameter in wastewater treatment and biogas production and a measure of the sum of all substances present in the solution that can be oxidized (by dichromate). It can be used to monitor the degree of degradation in the reactor over time and also to estimate the theoretical biogas potential. It is assumed that a complete degradation of 1 g COD produces approx. 350 mL of methane (Reinhold, 2004). The total COD content is made up of the particulate and dissolved COD. The COD can be determined either by titration or photometrically. In the course of the practical course, photometric rapid kits are used to determine the total COD. Incubation and measurement are carried out in devices designed for this purpose (NANOCOLOR thermoblock and photometer; Fig. 6).
Fig. 6: (A) NANOCOLOR thermoblock for incubating the round cells and (B) NANOCOLOR photometer for measuring the round cells for COD determination in the reactor sludge.Execution:
The thawed samples are first diluted 1:10 with A.d.. Pipette 2 mL of the solution into NANOCOLOR round cells. The cuvettes are then shaken (approx. 5 s) and incubated for 30 min at 160 °C in the NANOCOLOR heating block. After another shaking and an approx. half-hour cooling phase to room temperature, the cuvettes are measured with the NANOCOLOR photometer.
Evaluation:
The chemical oxygen demand for all preparations should be shown in the form of a bar chart in comparison to the control (mean value ± standard deviation). ATTENTION: The chemicals in the NANOCOLOR cuvettes are highly corrosive and harmful to health! For this reason, goggles and gloves must be worn when filling the cuvettes! After filling, the flasks must be carefully sealed. Both the incubation in the heating block and the subsequent cooling of the cuvettes must take place under the fume hood! The used cuvettes are put back into the box and then disposed of by the lab instructors.
3.4.7. Dry matter (DM) and organic dry matter (oDM)
As organic material usually contains different amounts of water, the dry matter is an important reference value and enables a direct comparison between different substrates. During anaerobic digestion, organic material is broken down and converted to a large extent into biogas. This leads to a reduction in (organic) dry matter, which is why TS and oTS are important parameters for monitoring biogas reactors. By continuously monitoring the values, the feeding strategy can be assessed and an excessively high or low rate can be detected. In addition, a sudden increase indicates a process malfunction and enables the operator to react in good time.
Execution:
Sludge samples (at least 30 g) from the pH measurement (3.4.1) or the EC measurement (3.4.2) are weighed into tared glass petri dishes (be sure to note the tare!) and the weight loss is determined at 105 °C overnight. Subsequently, approx. 1 g of the dried sample is weighed into ceramic dishes (also note the tare!) and incinerated for 5 hours at 550 °C in a muffle furnace (according to BGBl II 292/2001). The vessels must be cooled in a desiccator in the absence of oxygen both after drying at 105 °C and after muffling.
Formulas for calculation:
\(DM \ [\% FM] \ = \ Dried residue \ [g] \ × \ \frac{100}{FM \ [g]}\)
\(WC \ [\% FM] \ = \ 100\% \ - \ DM \ [\% FM]\)
\(ioDM \ [\% TS] \ = \ \frac{muffle residue \ [g] \ × \ 100} {DM \ [g]}\)
\(oDM \ [\% TS] \ = \ 100\% \ - \ ioDM \ [\% DM]\)
FM … Fresh Matter
WC … Water Content
ioDM … inorganic Dry Matter
\(oDM \ [\% FM] \ = \ DM \ [\% FM] \ × \ oDM \ [\% DM]\)
Evaluation:
DM and oDM (expressed as a percentage of the fresh mass) should be shown graphically over time for all approaches and the control (mean ± standard deviation).
3.4.8. Carbon/Nitrogen ratio (C/N)
The ratio of carbon to nitrogen is of great importance in environmental microbiology, as bioavailable nitrogen is a limiting factor for many growth processes. On the other hand, the carbon contained is the basis for biogas (CH4, CO2) in anaerobic fermentation and therefore limits the entire process. For this reason, the C/N ratio during production should be within a certain range (approx. 20-30) (Yadvika et al., 2004). If the ratio is too low, ammonium can accumulate and the pH value in the reactor can rise, which is toxic for methanogens (Wang et al., 2012). The C/N ratio in the bioreactor can be adjusted and optimized by adding different co-substrates. The amount of carbon and nitrogen is determined during the practical course using elemental analysis (Fig. 7). This involves burning the samples at 850 °C and determining the ratio of the resulting gases (CO2 and N2) using an infrared gas analyzer (IRGA).
Execution:
Samples from the TS determination (3.4.7) are ground to a fine powder and weighed into tin foils, if possible excluding residual air (max. 100-150 mg). The measurement is then carried out in the elemental analyzer. The tin foil must never be touched without gloves, as this could interfere with the measurement.
Evaluation:
The C/N ratio is calculated from the measured concentrations of carbon and nitrogen. The change in the C/N ratio over time should be shown graphically for all approaches compared to the control (mean ± standard deviation).
3.5. Hygienization potential
The use of fermentation residues as fertilizer has proven to be advantageous in many respects compared to non-fermented manure and slurry. One important reason for this is the hygienization of the substrate, which takes place in the course of anaerobic fermentation. This can increase the safety of spreading on meadows and fields. However, the efficiency of this hygienization depends on various parameters such as temperature and feeding strategy and can sometimes vary significantly. In the course of the practical course, we will determine the hygienization potential of the respective reactor systems using a classical, microbiological plating approach. Three different selective media (TBX Chromocult, XLT-4, PALCAM) will be used to detect relevant pathogens (coliform bacteria, Salmonella spp., Listeria spp.). Alternatively, pathogenic organisms could also be detected by molecular biology. Typical methods for this would be PCR (qualitative only), qPCR, dPCR, ddPCR or sequencing. In addition to the selective media, the total bacterial count (on standard medium) is also determined.
Preparations:
At the beginning of the practical course, sufficient plates are prepared for all analysis days and then stored in airtight packaging at 4 °C until use. The preparation is carried out according to the respective data sheets or Tab. 3.
| Quantity | Ingredient |
|---|---|
| 5.0 g | Peptone from meat |
| 2.5 g | Yeast extract |
| 1.0 g | Glucose |
| 15.0 g | Agar |
| 1000 mL | Fill up to 1000 mL with deionized water |
| …adjust to pH = 7 (25 °C) |
Execution:
Taken reactor samples are diluted 1:10 with sterile isotonic NaCl solution (0.9% w/v) and shaken for 15 min at 200 rpm. After a sedimentation phase of 30 min, dilutions are prepared in steps of 10 (100, 10-1, 10-2 for selective media; 10-5, 10-6, 10-7 for standard medium) and approx. 25 µL each are plated on agar plates. Sterile working is essential here! The plates are incubated at 37 °C for 24 h and then analyzed. Only the concentration with the best countable number of CFUs is used. If no CFUs can be detected even at the lowest dilution, the plates are incubated further and evaluated again within the next few days. After counting, morphologically interesting colonies are transferred to a master plate with standard medium. Using a sterile pipette tip, some cell material is “picked” from free-standing, clearly demarcated individual colonies. To do this, the tip of the pipette only needs to touch the colony lightly to pick up some of it (the pipette itself or the suction function of the pipette is not necessary for this). The tip is then dabbed into an empty box on the master plate using the grid provided for orientation without damaging the agar. The master plate is then incubated at 37 °C until the picked individual colonies are clearly visible. In the laboratory notebook, the numbered boxes must be used to note which colony was picked from which plate (standard medium, TBX Chromocult, XLT-4, PALCAM) so that subsequent identification is possible.
Evaluation:
The number of CFUs should be shown graphically for both measurement days and compared with the control (mean ± standard deviation). In addition, the reduction of general germs or pathogens after nine days of running time should be indicated as a percentage. ATTENTION: The supplements used to prepare the XLT-4 and PALCAM agar are highly corrosive. Therefore, extreme caution must be exercised when preparing these media and protective goggles and suitable gloves must be worn! In addition, the agar plates must not be opened after cultivation, as they contain highly enriched pathogenic microorganisms (Exception: Colony PCR 3.6.1 under laminar flow)! For incubation and storage, the plates must be labeled with appropriate warning stickers and autoclaved immediately after evaluation or, in the case of the first week after colony PCR, immediately autoclaved.
3.6. Bio-molecular characterization of pathogens
3.6.1. Colony PCR
In general, specific DNA fragments are amplified in large numbers in the polymerase chain reaction (PCR), enabling even the smallest amounts of DNA to be analyzed. In contrast to conventional PCR, colony PCR does not use pure DNA as starting material. Instead, cell material (e.g. from a bacterial colony) is directly inoculated and the DNA it contains is then amplified. In this way, the time-consuming and relatively expensive step of DNA extraction can be avoided.
Execution: Each group examines five morphologically interesting colonies from the master plates (3.5) of the first week. First, a master mix is prepared in sufficient quantity (number of samples examined + 1). This is done in sterile 0.5 mL Eppendorf tubes (do not forget to label!) according to the protocol in Tab. 4. After preparation, the tube must be tightly closed and vortexed for 5 s.
Tab. 4: Master mix for colony PCR analysis of selected pure cultures. Quantities for one sample.| Volume [µL] | Reagent |
|---|---|
| 12.5 | VWR Red Taq DNA Polymerase 2x Mastermix, 1.5 mM MgCl2 |
| 0.5 | Forward Primer: 27F (5’-AGA GTT TGA TCA TGG CTC A-3’) |
| 0.5 | Reverse primer: 1492R (5’-TAC GGT TAC CTT GTT ACG ACT T-3’) |
| 0.5 | Bovine serum albumin (BSA, 2%) |
| 11.0 | PCR H2O |
| 25.0 | TOTAL VOLUME |
Subsequently, 25 µL of master mix is pipetted into sterile PCR tubes and inoculated with cell material. For this purpose, suitable colonies are selected on the selective agar plates and small amounts are transferred to the tubes using sterile pipette tips. The finished tubes are vortexed for 5 s, briefly centrifuged with a tabletop centrifuge and placed in the thermal cycler (BioRad T100; Fig. 9). The program is started according to the instructions in Tab. 5. After completion, the tubes are stored at -20 °C until further use.
ATTENTION: To over-inoculate the cell material, the agar plates with highly enriched bacteria must be opened. This may only be done under the laminar flow! The plates are only opened until enough cell material has been removed and are then closed again immediately. The pipette tip used and the laboratory gloves are disposed of in a specially labeled waste container. Hands must be disinfected after this step!
Tab. 5: Program for colony PCR testing of selected pathogens.| Phase | Temperature [°C] | Duration [s] | Cycles |
|---|---|---|---|
| Initial denaturation | 95 | 300 | 1 |
| Denaturation | 95 | 30 | 35 |
| Primer annealing | 54 | 30 | 35 |
| Elongation | 72 | 45 | 35 |
| Final elongation | 72 | 600 | 1 |
| End | 12 | - | - |
3.6.2. DNA purification
DNA amplified with the aid of PCR is usually subsequently purified (DNA clean-up) so that subsequent analyses are not disturbed by residues of the PCR reaction. In the practical course, purification is carried out using a special PCR clean-up kit (Sigma-Aldrich GenElute PCR clean-up). All centrifugation steps are carried out at 11,000 g. Procedure: Each sample is diluted 4:1 (e.g. 25 µL PCR product + 75 µL buffer) with NT buffer in 2 mL Eppendorf tube (label!). Then NucleoSpin Extract Columns are inserted into fresh 2 mL Eppendorf tubes and loaded with the diluted samples. After centrifugation for 1 min (discard flow-through), 600 µL NT3 buffer is added and centrifuged again for 1 min. Now the flow-through is discarded and the tubes are centrifuged for another 2 min to dry the filter. The filters are placed in new, sterile 1.5 mL tubes and covered with 30 µL PCR water. After a short incubation phase (1 min at room temperature), centrifuge for 1 min (the filters are discarded) and store the eluate at 4 °C in the refrigerator until further use.
3.6.3. Gel electrophoresis
Gel electrophoresis is a common method for testing PCR samples. In the practical course, the analysis is carried out on a 1% agarose gel. The DNA fragments separate according to their length and are then visualized under UV light. A successful colony PCR should result in one clear band per sample.
Preparations:
To prepare the gel (one gel per group), 150 mg agarose and 15 mL 0.5x TAE buffer are filled into a 100 mL Erlenmeyer flask. The mixture is boiled in the microwave until the agarose has completely dissolved. Then add 1 µL DNA dye (SYBR Safe DNA gel stain), shake thoroughly and pour the liquid into a small gel chamber. Combs (optionally one or two) with a sufficient number of teeth are inserted into the still liquid gel. If necessary, air bubbles are removed with a sterile pipette tip. The gel takes about 15 minutes to harden completely and can be loaded.
Execution:
After removing the combs, the hardened gel including the holder is removed from the gel chamber and carefully placed in the electrophoresis chamber (Fig. 10). The liquid in the chamber must completely cover the gel, otherwise new 0.5x TAE buffer must be added. To load the gel, pipette 1.5 µL of sample into the pockets. The sequence must be noted! Pipette 1.5 µL DNA Ladder (GeneRuler Express) into a pocket (usually the first or last). Once all samples and the ladder have been loaded, the lid of the electrophoresis chamber is closed and the program is started at 100 V for 15 min. At the end of the running time, the gel is removed, carefully pushed onto the UV table and examined with the lid closed. The result can be photographed.
ATTENTION: The marked safety zone must be observed! Objects standing there must not leave the area and separate gloves must be used (and then disposed of in the hazardous waste garbage can). The electrophoresis chamber must be unplugged when handling, otherwise there is a risk of electric shock. The device may only be plugged in and started when the lid is closed. The gel may only be examined on the UV table when the lid is closed. Direct UV light can otherwise cause damage, especially to the eyes!
3.6.4. DNA quantification
There are a number of different methods for determining the DNA content in a sample. In the practical course, quantification is carried out using a fluorometer (Promega Quantus). Alternatives would be the Nanodrop system or a photometric measurement with PicoGreen DNA dye.
Execution:
Each group prepares a stock solution for all their samples (+ 1). For each sample, 197.5 µL 1x TE buffer and 0.5 µL dye must be calculated. Then pipette 198 µL of the stock solution and 2 µL of sample into analysis tubes, vortex and measure in the Quantus Fluorometer (Fig. 11) after an incubation time of 2 min. The dye or all solutions containing the dye must be protected from light as much as possible (use aluminum foil!), as the substance is light-sensitive and can be destroyed quickly! If the measured values are above the measuring range, the affected samples must be diluted 1:10 with 1x TE buffer and measured again (the entire procedure must be repeated!).
3.6.5. DNA sequencing and BLASTing
There are different techniques for sequencing DNA. New systems such as Illumina, IonTorrent or Nanopore can analyze large quantities of sequences simultaneously and thus enable the analysis of entire genomes or complex environmental samples. Sanger sequencing is an older technology, but is perfectly suited to the sequencing of a pure culture due to its very low price and low susceptibility to errors. The samples in the practical course are therefore analyzed using Sanger sequencing and the DNA sequences obtained are then blasted. Blasting is the process of comparing a DNA sequence with an existing database and searching for the best matching entries. This enables the (taxonomic) assignment of an unknown DNA sequence. The quality of the database is decisive for the result! Common databases for bacterial gene fragments (usually 16S) are NCBI, Silva, Greengenes or RDP.
Execution:
Pipette 15 µL of the purified DNA extract from each sample into sterile 1.5 mL Eppendorf tubes. In addition, 2 µL of the forward primer (27F) used is added and the tubes are carefully sealed. Each tube is labeled with a prepaid sticker provided by the sequencing company. The code on the sticker and the corresponding sample name must then be entered into the online order form. The finished tubes are packed in an air bubble envelope and must be dropped into the company’s mailbox (1st floor, opposite the soil laboratory) by 4 pm at the latest. Within 24 hours, the results will be provided in the form of .fasta files. The DNA sequences contained therein are then analyzed using the online blast tool (https://blast.ncbi.nlm.nih.gov/Blast.cgi). We use the “Nucleotide collection” database from NCBI as a reference database.
4. Bibliography
- Ahring, B.K., Angelidaki, I., de Macario, C.C., Gavala, H., Hofman-Bang, J., Elfering, S.O., Raskin, L., Stams, A., Westermann, P., Zheng, D. 2003. Biomethanation I. Springer.
- BMVIT. 2014. Zusammensetzung von Biogas. Available at: http://www.biogas-netzeinspeisung.at/technische-planung/funktionsprinzip-einer-biogasanlage/zusammensetzung-von-rohbiogas.html. Accessed: 22.06.2018
- Boe, K., 2006. Online monitoring and control of the biogas process. Institute of Environment and Resources, Technical University of Denmark.
- Conrad, R., Schink, B., Phelps, T.J., 1986. Thermodynamics of H2-consuming and H2-producing metabolic reactions in diverse methanogenic environments under in situ conditions. FEMS microbiology letters. 38(6), 353-360.
- Drosg, B. 2013. Process monitoring in biogas plants. IEA Bioenergy Task.
- EU, 2014. State of play on the sustainability of solid and gaseous biomass used for electricity, heating and cooling in the eu. On the WWW. URL https://ec.europa.eu/energy/sites/ener/files/2014_biomass_state_of_play_.pdf.
- Goberna, M., Podmirseg, S., Waldhuber, S., Knapp, B., García, C., Insam, H., 2011. Pathogenic bacteria and mineral N in soils following the land spreading of biogas digestates and fresh manure. Applied soil ecology. 49, 18-25.
- Hasegawa, S., Shiota, N., Katsura, K., Akashi, A., 2000. Solubilization of organic sludge by thermophilic aerobic bacteria as a pretreatment for anaerobic digestion. Water science and technology. 41(3), 163-169.
- Hupfauf, S., Plattner, P., Wagner, A.O., Kaufmann, R., Insam, H., Podmirseg, S.M., 2018. Temperature shapes the microbiota in anaerobic digestion and drives efficiency to a maximum at 45° C. Bioresource technology. 269, 309-318.
- Insam, H., Gómez-Brandón, M., Ascher, J., 2015. Manure-based biogas fermentation residues–Friend or foe of soil fertility? Soil Biology and Biochemistry. 84, 1-14.
- Jain, S., Jain, S., Wolf, I.T., Lee, J., Tong, Y.W., 2015. A comprehensive review on operating parameters and different pretreatment methodologies for anaerobic digestion of municipal solid waste. Renewable and Sustainable Energy Reviews. 52, 142-154.
- Kaiser, F.L. 2007. Einfluss der stofflichen Zusammensetzung auf die Verdaulichkeit nachwachsender Rohstoffe beim anaeroben Abbau in Biogasreaktoren, Technische Universität München.
- Koster, I., Rinzema, A., De Vegt, A., Lettinga, G., 1986. Sulfide inhibition of the methanogenic activity of granular sludge at various pH-levels. Water Research. 20(12), 1561-1567.
- Laaber, M., 2012. Gütesiegel Biogas: Evaluierung der technischen, ökologischen und sozioökonomischen Rahmenbedingungen für eine Ökostromproduktion aus Biogas. Universität für Bodenkultur Wien, Wien.
- Labatut, R.A., Angenent, L.T., Scott, N.R., 2014. Conventional mesophilic vs. thermophilic anaerobic digestion: a trade-off between performance and stability? Water research. 53, 249-258.
- Ma, J., Amjad Bashir, M., Pan, J., Qiu, L., Liu, H., Zhai, L., Rehim, A., 2018. Enhancing performance and stability of anaerobic digestion of chicken manure using thermally modified bentonite. Journal of Cleaner Production. 183, 11-19.
- Meseguer-Lloret, S., Molins-Legua, C., Campins-Falco, P., 2002. Ammonium determination in water samples by using OPA-NAC reagent: a comparative study with nessler and ammonium selective electrode methods. International Journal of Environmental & Analytical Chemistry. 82(7), 475-489.
- Reinhold, F., 2004. TOC statt CSB – oder “New CSB”? Korrespondenz Abwasser. 51(7), 705.
- Richards, B.K., Cummings, R.J., White, T.E., Jewell, W.J., 1991. Methods for kinetic analysis of methane fermentation in high solids biomass digesters. Biomass and Bioenergy. 1(2), 65-73.
- Sahlström, L., 2003. A review of survival of pathogenic bacteria in organic waste used in biogas plants. Bioresource technology. 87(2), 161-166.
- Taherzadeh, M.J., Karimi, K., 2008. Pretreatment of lignocellulosic wastes to improve ethanol and biogas production: a review. International journal of molecular sciences. 9(9), 1621-1651.
- Tian, G., Yang, B., Dong, M., Zhu, R., Yin, F., Zhao, X., Wang, Y., Xiao, W., Wang, Q., Zhang, W., 2018. The effect of temperature on the microbial communities of peak biogas production in batch biogas reactors. Renewable Energy. 123, 15-25.
- Wang, X., Yang, G., Feng, Y., Ren, G., Han, X., 2012. Optimizing feeding composition and carbon–nitrogen ratios for improved methane yield during anaerobic co-digestion of dairy, chicken manure and wheat straw. Bioresource Technology. 120, 78-83.
- Weiland, P., 2008. Wichtige Messdaten für den Prozessablauf und Stand der Technik in der Praxis. Gülzower Fachgespräche. 27, 17-31.
- Yadvika, Sreekrishnan, T., Kohli, S., Rana, V., 2004. Enhancement of biogas production from solid substrates using different techniques—-a review. Bioresource technology. 95(1), 1-10.
Appendix
Tab. 6: Ampelsystem der BOKU Wien zur Einschätzung der gemessenen Parameter bezüglich der Arbeitsweise des Biogas-Reaktors (Laaber, 2012).| Parameter | Einheit | Grün | Gelb | Rot |
|---|---|---|---|---|
| CSB | [g/kg] | 40 - 90 | < 40; 90 - 110 | > 110 |
| TS | [% FM] | 4 - 8 | < 4; 8 - 9 | > 9 |
| oTS | [% FM] | 3 - 6 | < 3; 6 - 7 | > 7 |
| NH4+ | [g/kg] | < 5 | > 5 | - |
| Acetat | [g/L] | < 1 | 1 - 3 | > 3 |
| Propionat | [mg/L] | < 250 | 250 - 1000 | > 1000 |
| Butyrat | [mg/L] | < 50 | 50 - 100 | > 100 |
| Iso-Butyrat | [mg/L] | < 60 | 60 - 200 | > 200 |
| Valeriat | [mg/L] | < 50 | 50 - 100 | > 100 |
| Iso-Valeriat | [mg/L] | < 50 | 50 - 100 | > 100 |
| VFA gesamt | [g/L] | < 1.5 | 1.5 - 4.5 | > 4.5 |
| EC | [mS/cm] | 18 - 20 | < 18; 20 - 60 | > 60 |
| pH | - | 7.5 - 8.1 | 7.1 - 7.5 < 7.1; | > 8.1 |
| FOS/TAC | - | 0.3 - 0.5 | 0.2 - 0.3; 0.5 - 0.6 | < 0.2; > 0.6 |
| C/N | - | 20 - 30 | 15 - 20; 30 - 35 | < 15; > 35 |